It is possible to connect to many data sources using Power Query (more in this article) and SQL Server database is one of them. This article will tell you how to set connection to SQL Server table directly from Excel in few simple steps.
Guide to Data Import and Connecting to SQL Server from Excel via Power Query
It is not needed to use Power Query to establish a connection with SQL Server although it is the most comfortable way. This way to import data can be found in article How to execute SQL query in Excel. But back to our topic.
We will import prepared view to SQL Server instance localhost\MOJEINSTANCE in database Temp. The view is named udv_SalesByProducts and it displays sales by product with time context. This view is needed to be imported into Excel together with connection to database so that we will be able to refresh the data in Excel whenever we want to.
In case you do not know where is your SQL server located or you do not hold access rights, let your IT admin help you.
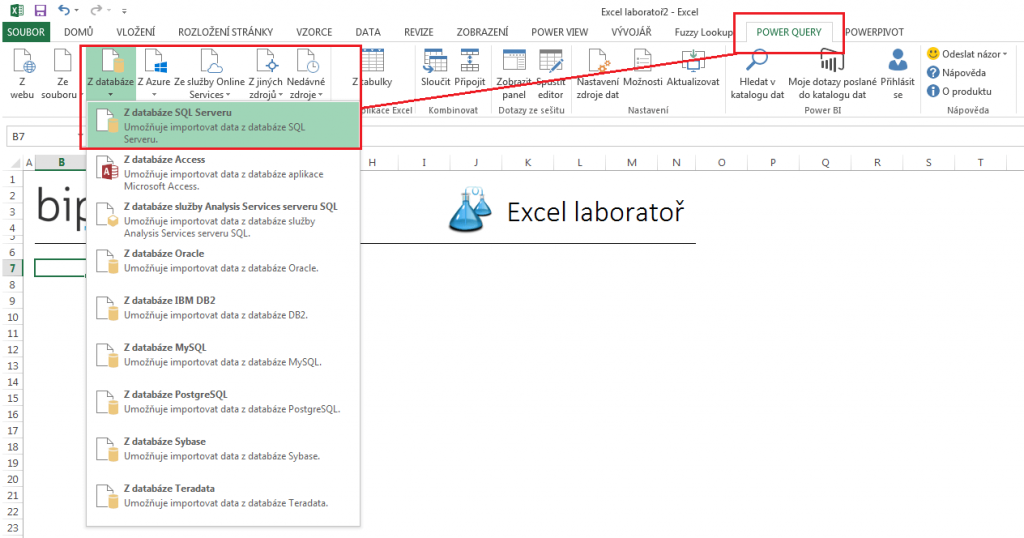
Step 1) Select Power Query card in Excel – from database – from SQL Server database
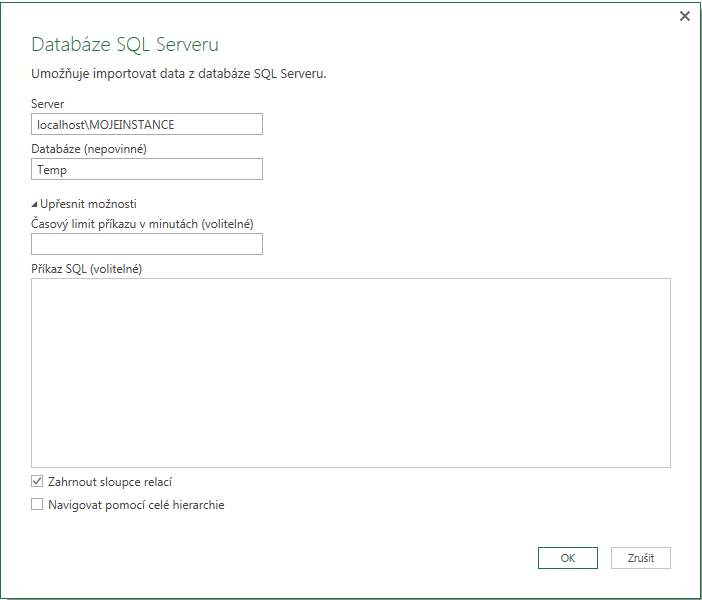
Step 2) Fill in name of the server and database in which is the view located. You have an option to set SQL query to perform on the server. We will leave the field for the SQL command empty since object (view) is needed to be displayed.
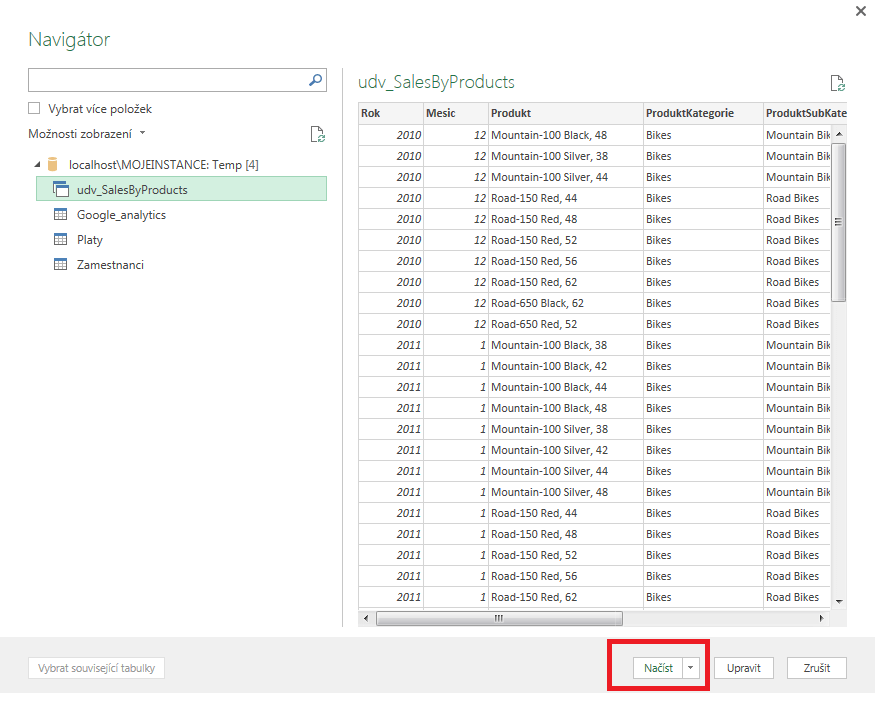
Step 3) In the last step, all that’s left to do is select object and confirm via load button. We also have an opportunity to edit data further and create steps continuity using Power query editor. These steps would perform after every update.
The table has been created on the newly created list. It contains data from SQL Server and it is possible to update it as you wish.


