

In previous article we created a project and empty report in the BI tool SSDT (SQL Server Data tools) – Part 1 -SSRS project and report creation. It was a kind of preparation for this part in which we will configure the report to be able to query a database (SQL Server database in our case). We will find out how to configure data source in SSRS.
How to Configure Data Source in SSRS
Previous part ended by having correctly created project and empty report, as seen in the screenshot:
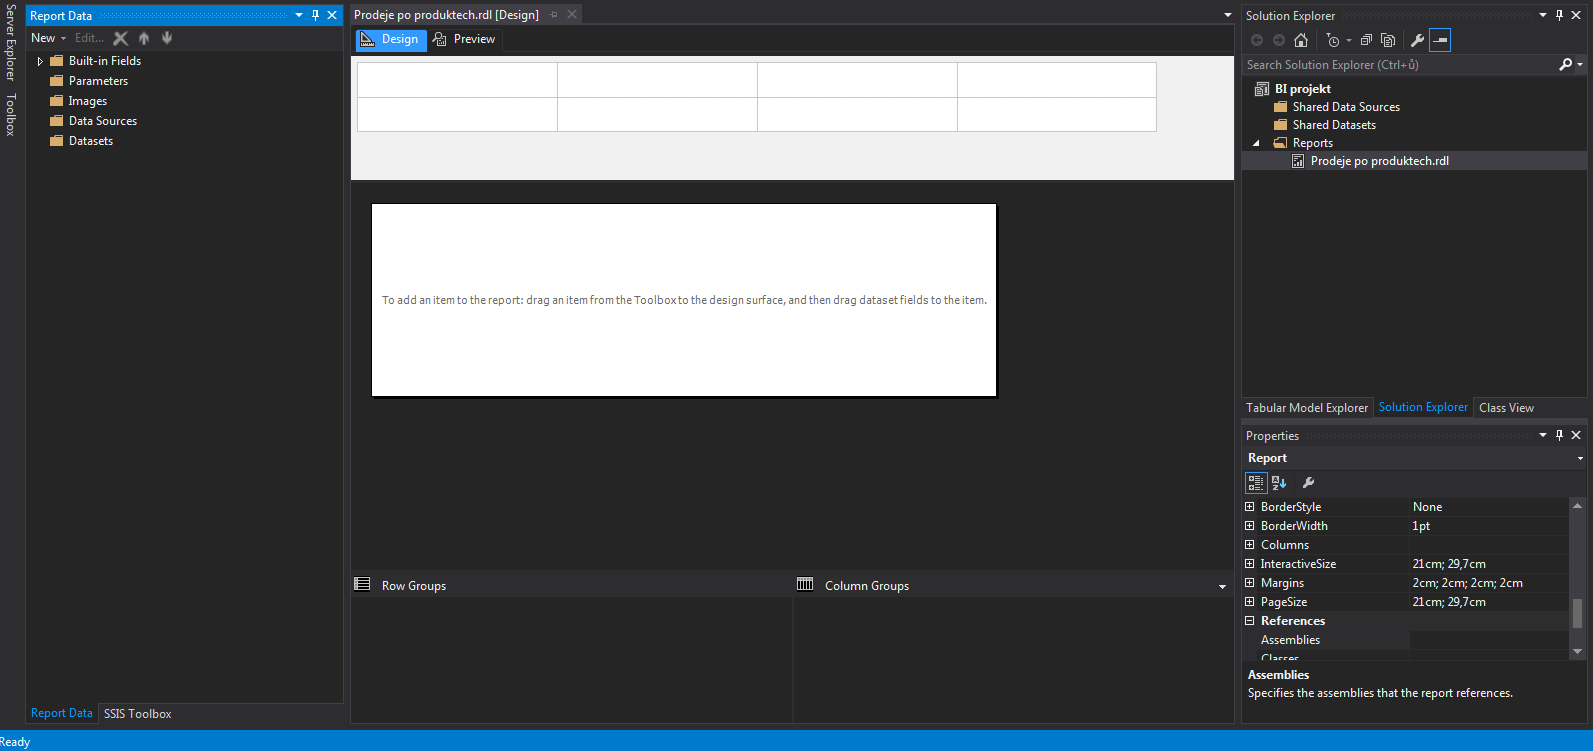
This is how your project should look like now. To allow the report to extract data from a database we configure connection to a data source database.
We create connection to the data source by creating new “Data source” (as shown below). Data source will be the SQL database. There are 2 options how to create a source:
- Individual Data source for a report – There is an option to set a data source for each report independently. If you create it this way, you will not be able to use it for another report.
- Shared data source – In this case, we create share data source for the whole project. If you expect to have more reports in a project that will use the same database, this is the way to go. But take in mind that you cannot run reports individually (you have to deploy a project).

[1] Individual and shared data source explanation

[2] Shared data source creation
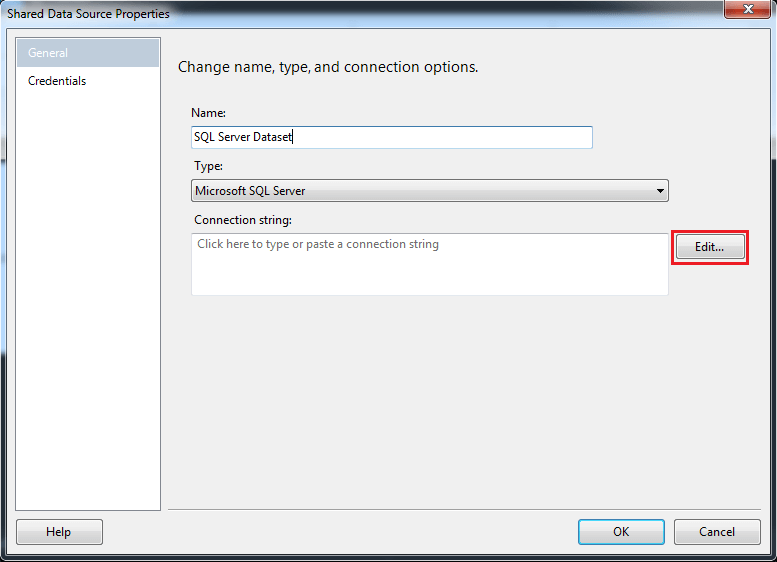
[3] Naming the data source

[4] Creating connection – SQL Instance a database

[5] SSRS Data source Test connection
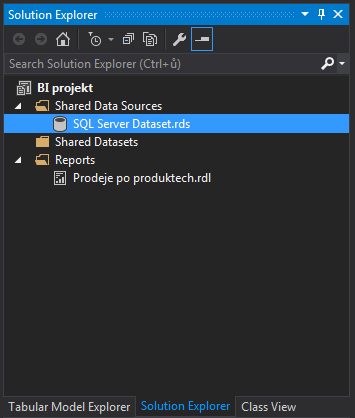
[6] Final SSRS Data source
We have set up shared dataset to which we can create a reference in any report inside the project. The final step to go through is adding the reference in our report to shared Data source. In report data section click on Data source – Add new data source [7]. Name the data source (caution – no spaces) and use option “Use shared data source reference” [8]. The result should be a view on BI project identical to the one in the picture [9]. (Sorry about text in Czech, this article comes originally from my czech written blog. Anyway I belive it helps)
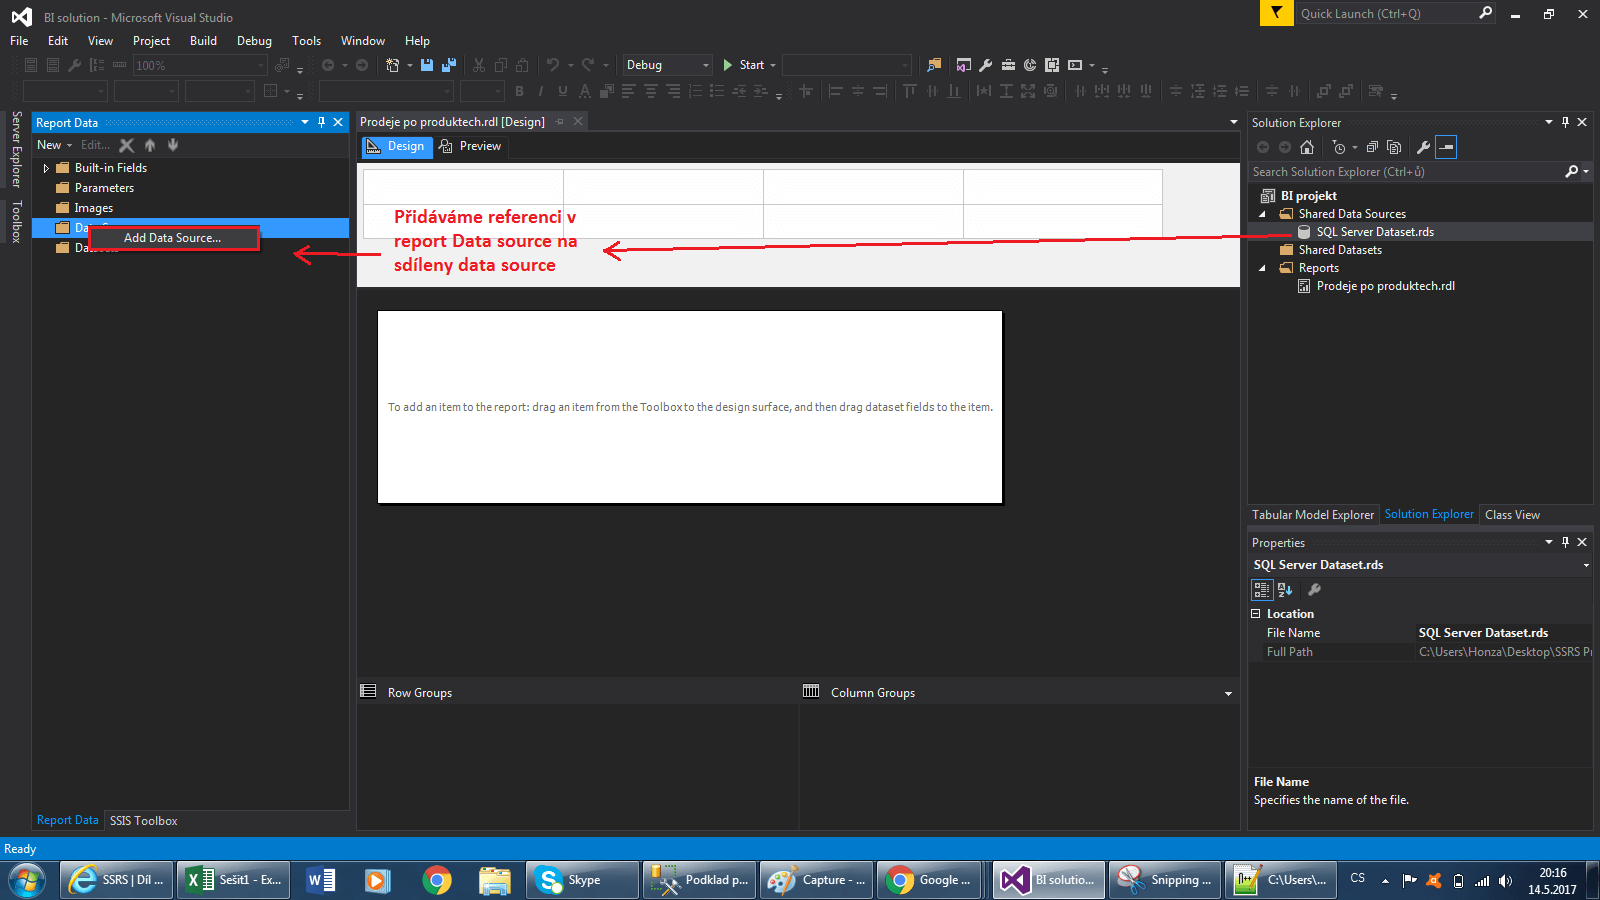
[7] Creating data source for the report
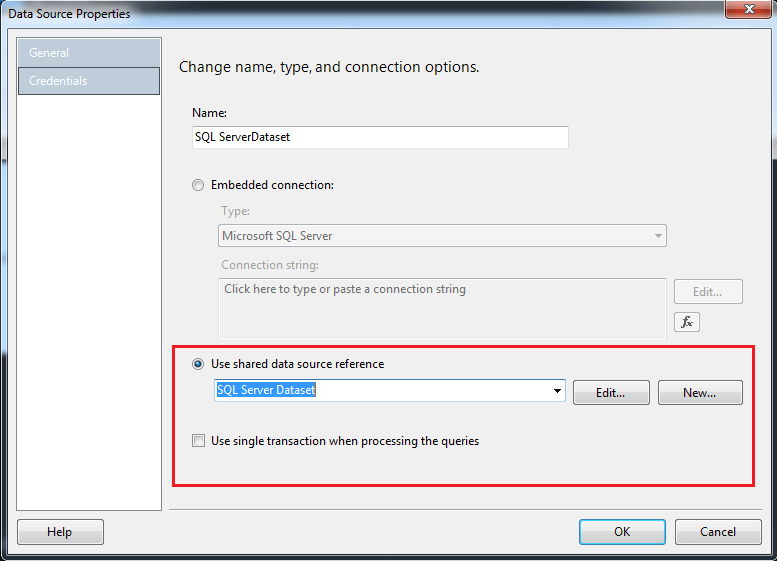
[8] Reference to a Shared Dataset in our project

[9] Final reference to shared (project) data source