In this article I will show you how to create Reporting services (SSRS) project and report step by step. This is a first step before we will be able to create report. To even start working with Reporting Services tool, we need to meet these requirements:
- Visual studio 2019 (or SSDT) – in case we use Visual studio 2019 we have to install extra SSRS add-in. In case we are going to use something like SSDT, everything is prepared after installation, no action needed.
- SQL Server instance for storing data with SQL Server Management studio to be able to query a database
- Microsoft AdventureWorksDW2014 sample database or some data to play with
SSRS Project and Report Creation
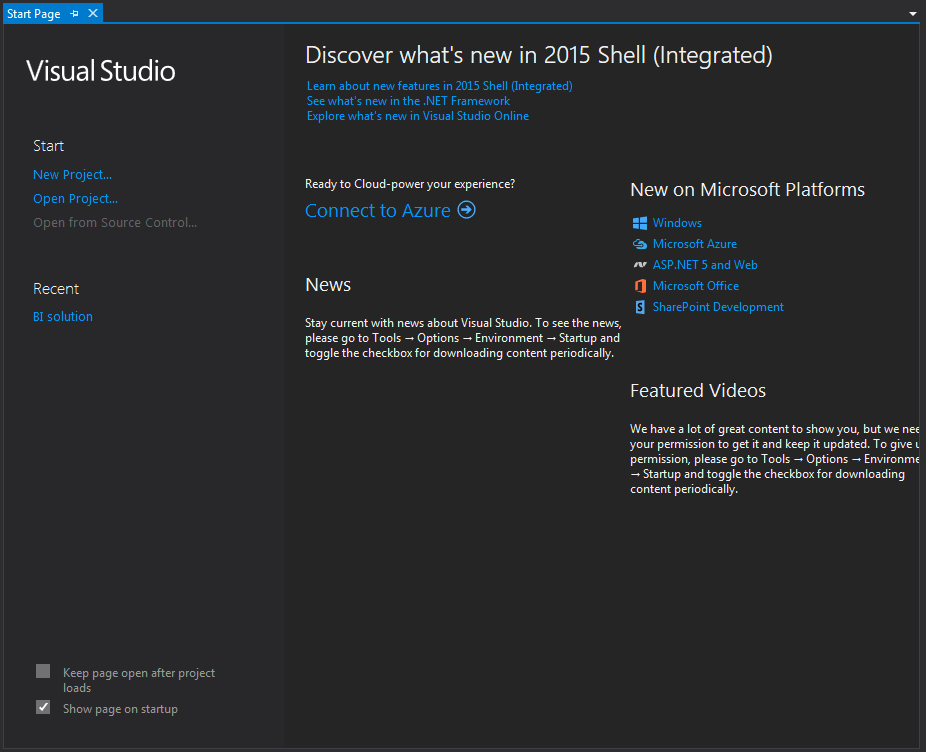
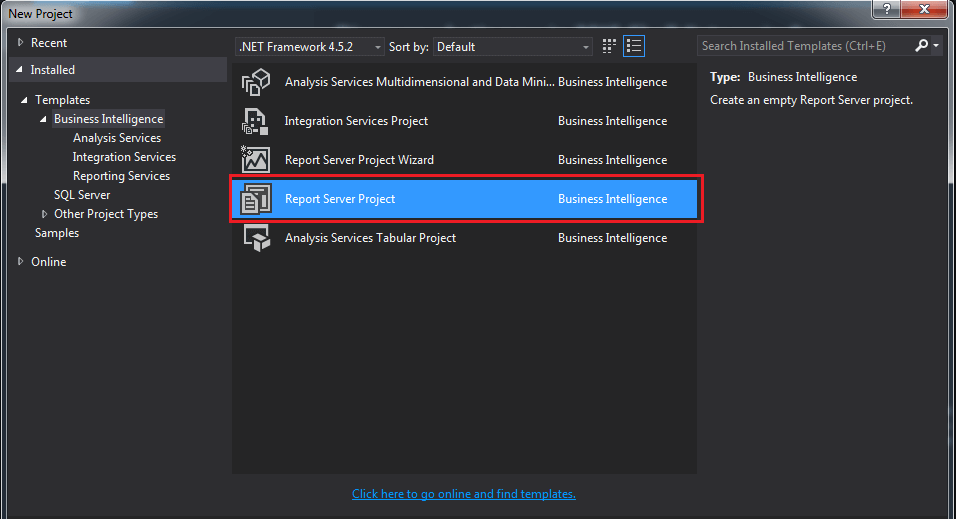
SSRS projects are files containing reports, datasets and data connectors in form of XML code. The file contains basically everything for the succesfull communication of a report with a data source (typically a database). The file can be graphically represented in some program – we use Visual studio. There are couple of options after we launch Visual studio. Let’s create a new project and on the next screen select Report Server Project (see screenshots below).
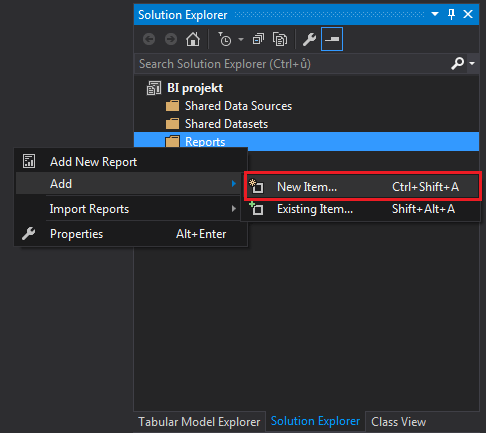
- Add new report – in this case, report creation wizard is activated. It will guide you through all stuff. I personally do not like report wizard and therefore I use the second option
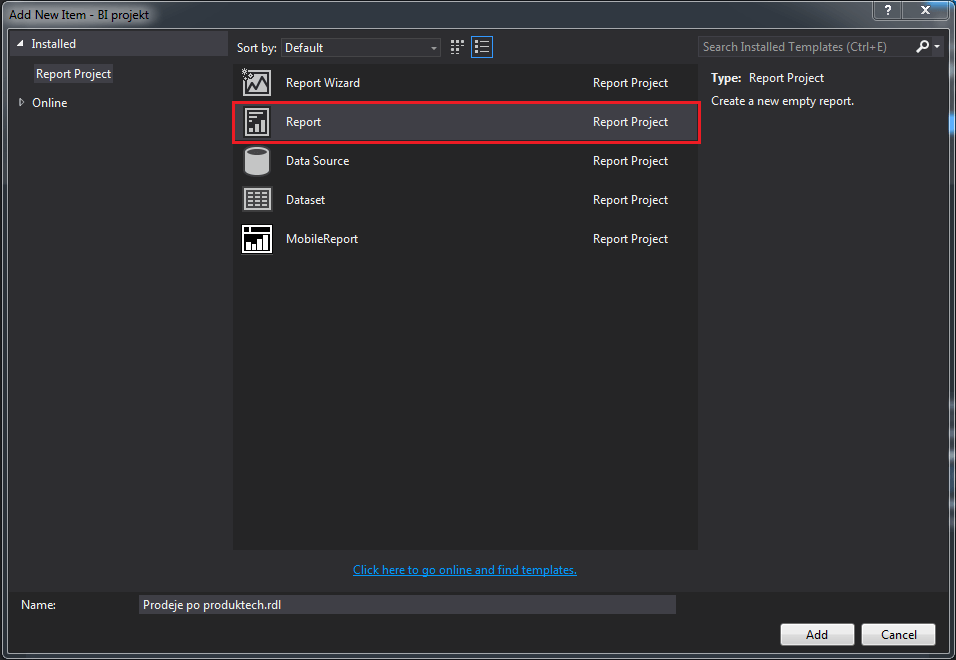
- Add New item followed by selecting Report – wizard does not activated this case. You can make everything by your own. So, create report named “Prodeje po produktech” (Czech screenshots) – translation is Sales by products. You can see that out report has been successfully created with .rdl extension
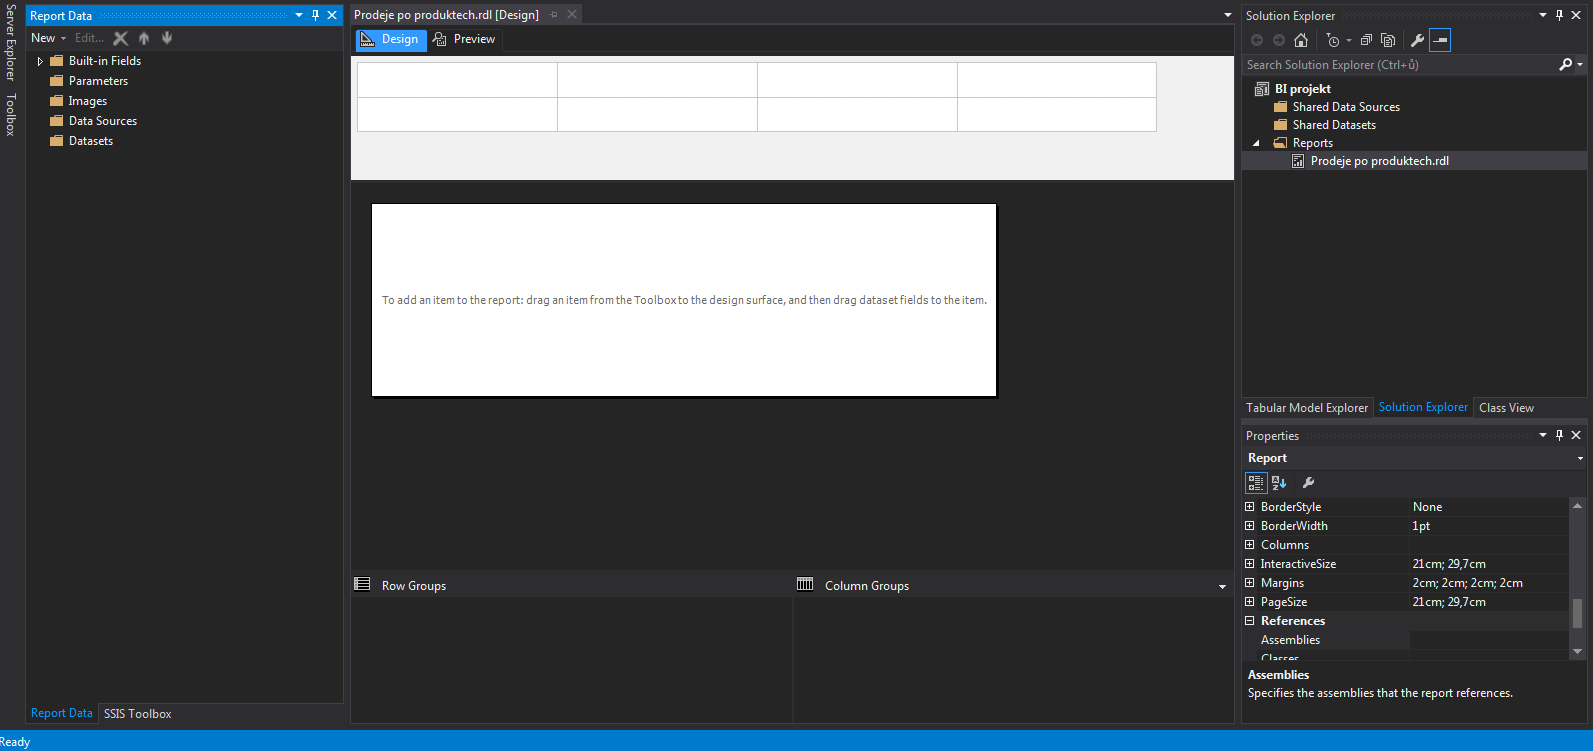
We just created empty report in reporting services project. What’s next is creating Data source for SSRS to our source of data