

In the previous article – ETL | Mage.ai – Solid Alternative to Airflow – Intro and Installation we introduced the ETL tool Mage.ai as a lighter alternative to Apache Airflow. We demonstrated how to get the framework up and running through the terminal and learned that after installation, it runs on localhost:6790/. I promised in the next article to dive into our first integration, but there’s still one small thing missing – the dbt installation.
While dbt is not required to run Mage at all, this framework is becoming increasingly popular and many developers find it indispensable. So, we will briefly cover this topic.
This guide can also serve as a general guide for installing dbt independently of Mage.
Dbt installation – Requirements
1) Installation of Mage via Docker (skip if not running with Mage.ai) – According to Mage documentation, integration with dbt within Mage is only supported if the framework is installed via Docker. Be aware, our original installation guide was via pip. So, if you need to run dbt within mage.ai as well, you’ll need to perform a new installation – instructions here. The final state should look something like this screenshot.

2) Python 3.6 or newer – likely already installed, if not download Python.
3) Database engine is needed – During the installation or initialization of dbt, we choose which database platform to use. When initializing dbt, it wants us to select this platform from the installed adapters. During installation, we can choose from:
- dbt-core
- dbt-postgres
- dbt-redshift
- dbt-snowflake
- dbt-bigquery
- dbt-trino
- dbt-sqlserver (our case) – I have SQL Server installed, so I choose this. You may choose a different adapter or install SQL Server.
If we do not want to use any platform yet, we will only install dbt-core and configure everything later.
Dbt Installation from Terminal/Command Line (cmd)
This process is not the only way to install dbt, but this is how I did it – Open the terminal/command line cmd and handle the environment setup either through conda command (if Anaconda is installed) or via pip – choose one option:
1) Creating an environment for dbt mage-ai
Use the command to create a new environment named mage-ai
- anaconda -> “conda create –name mage-ai python=3.8”
- pip -> “python -m venv mage-ai”


We can see the installation progress in the first screenshot and in the second, we see that a new environment has been created in Anaconda.
2) Activating the created environment
- conda -> “activate mage-ai”
- pip (mac) -> “source mage-ai/bin/activate”
- pip (windows) -> “mage-ai\Scripts\activate”

3) Installing Dbt into the mage-ai environment
In this part, we perform the installation of dbt and the sql server adapter. The installation is carried out in the environment we previously set up. Therefore, it is necessary to have our newly created environment activated (see previous steps). Then, we carry out the installation with the command:
- conda -> not working
- pip -> “pip install dbt-sqlserver”

We check the correct installation with the command “dbt –version” – it looks okay.

4) Initializing Dbt and creating the “mage_dbt” project
Initializing Dbt is a creation of a specific dbt project and the file structure for this project. Initialization is performed as follows:
- In the terminal/cmd choose the folder where we want our dbt project. If using Mage.ai, we likely want to have the project in a directory designated for it – where you installed the Mage project (see the article on installing Mage.ai)

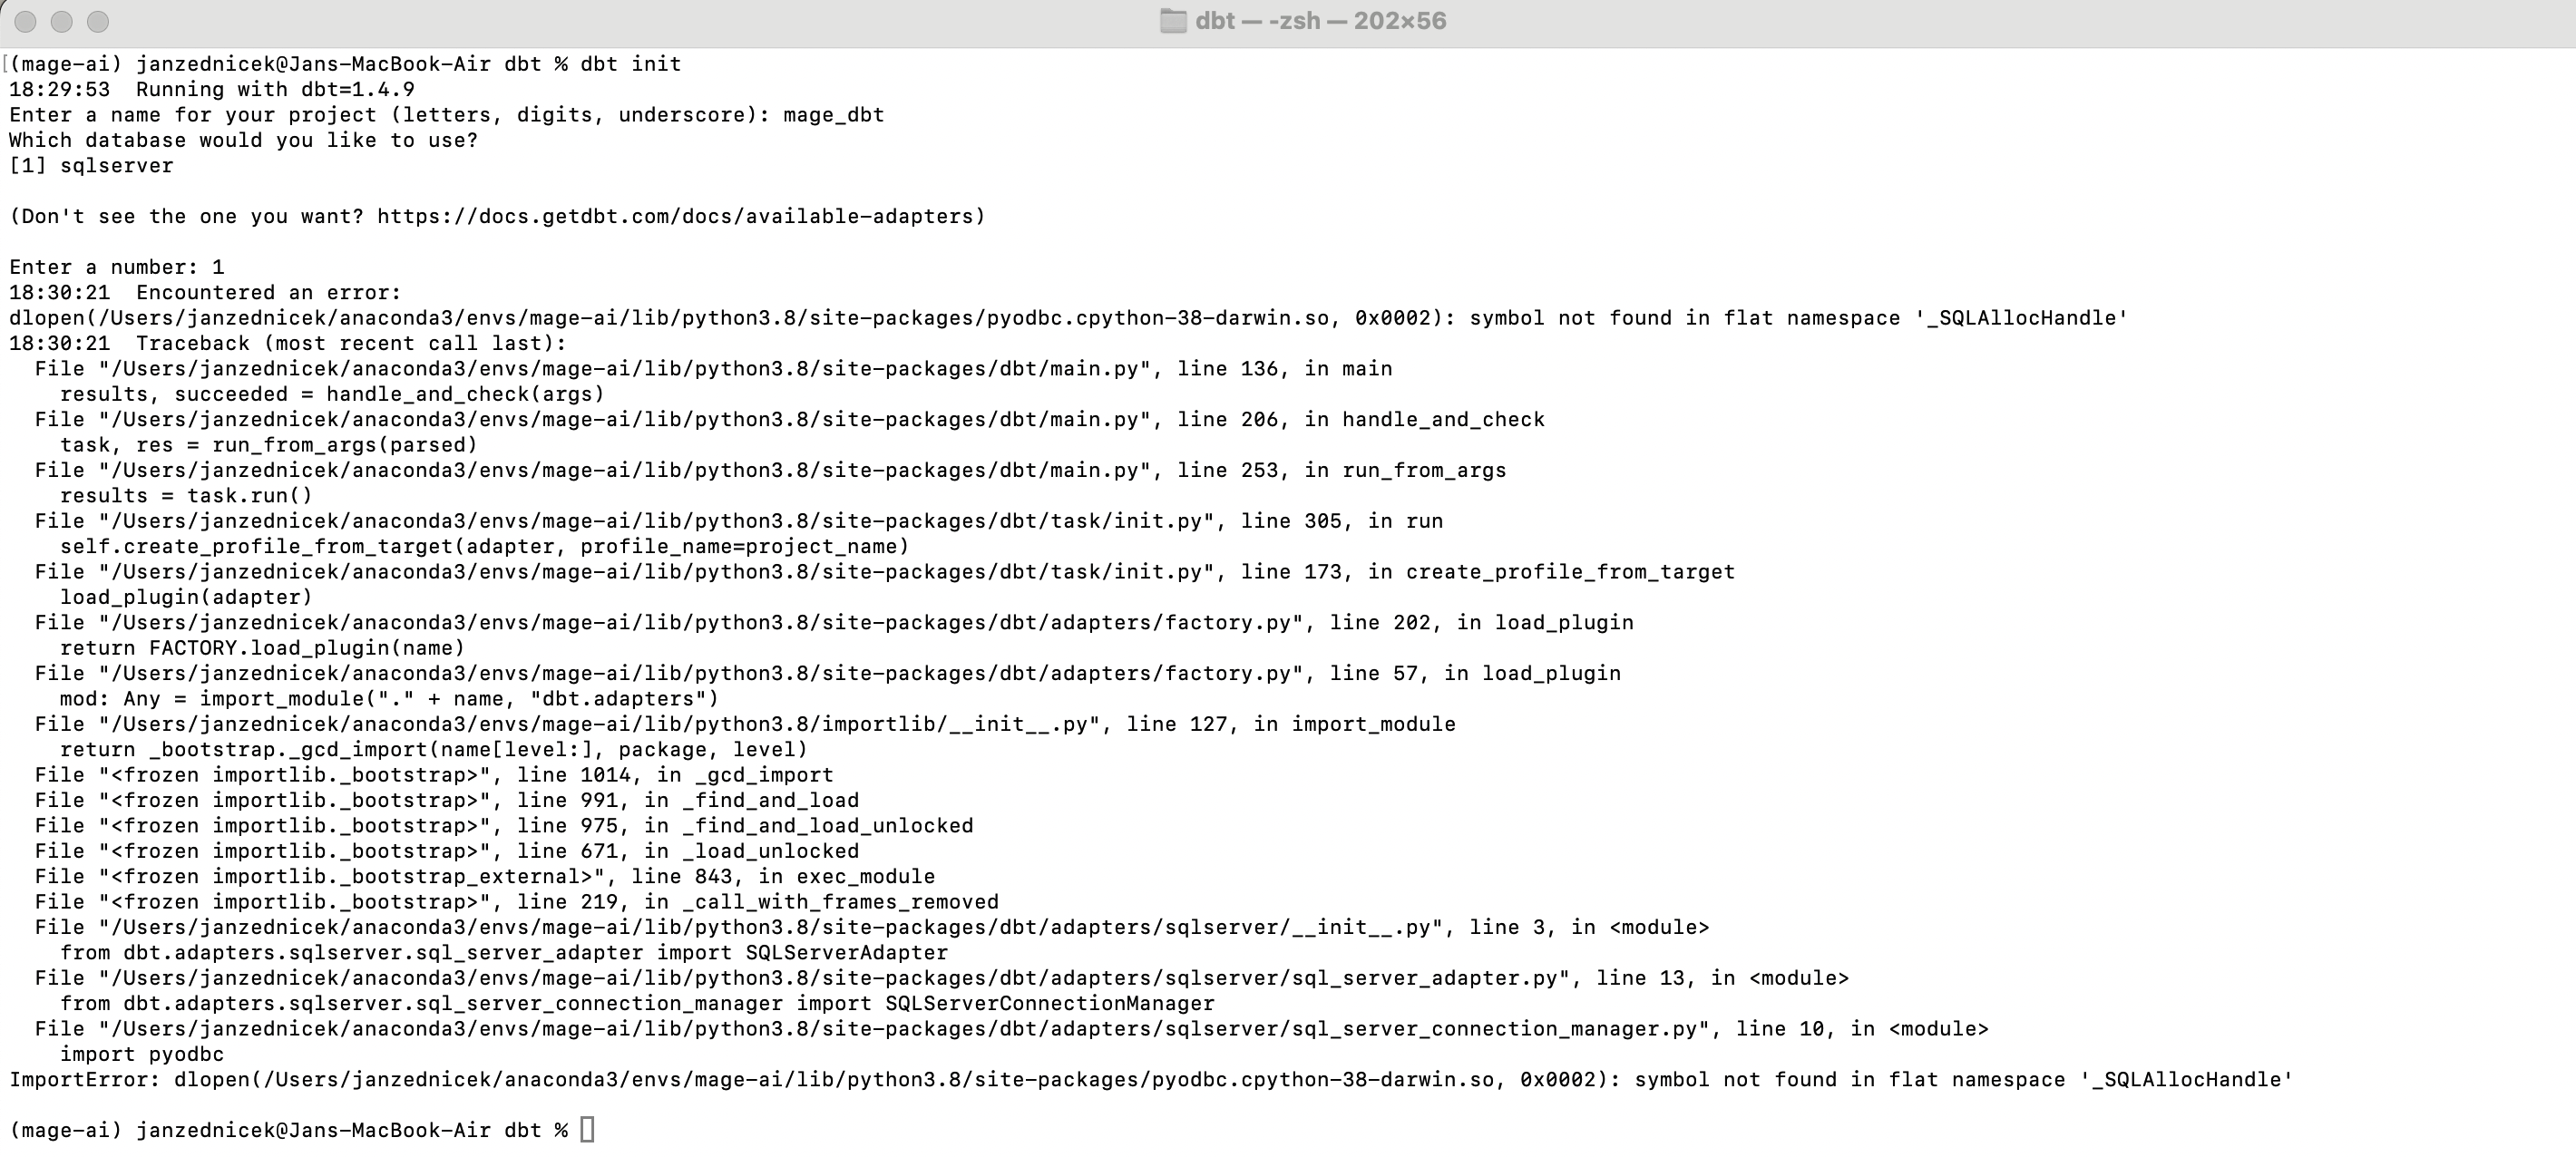
- In this folder, we initialize the dbt project with the command “dbt init”. It then asks us for the name of the project, which I will call “mage_dbt”, and it wants us to choose the database adapter. Since we have only installed the adapter for SQL Server in the previous step, we entered 1 as shown in the screenshot.
- Below, we see that the project was successfully created and in our root directory of mage-ai/dbt, we have a new folder mage-dbt. We can explore it and check if we see it from the Mage.ai environment.

- Everything looks okay; in the root folder of our mage-ai project, we see the dbt folder – this is automatically created for the dbt project when we install mage. In it, we already see our created project mage_dbt.
That was the Dbt installation process in a nutshell. Here’s a link to the complete dbt documentation. At this point, our installation phase ends and the setup phase begins. It is necessary to set up configuration files in dbt to suit our environment so that everything works – namely the dbt_project.yml and profiles.yml files through which we connect to our database environments (dev, prod). I will look at this next time.